
Install Ubuntu MATE
Koha officially supports Ubuntu MATE. Download Ubuntu-MATE-20.04.1-desktop(amd64 bit) from the following link,Open Terminal on your Ubuntu machine for Dspace installation.
sudo apt-get updatesudo apt-get upgradeInstall Git.
sudo apt-get install gitCheck git Version.
git --versionAdd git Key.
sudo add-apt-repository ppa:git-core/ppaUpgrade git version.
sudo apt update; apt install gitsudo apt-get install openjdk-8-jdkInstall Maven.
sudo apt-get install mavensudo apt-get install antInstall Postgresql.
Add Postgresql Source file location.
sudo sh -c 'echo "deb http://apt.postgresql.org/pub/repos/apt $(lsb_release -cs)-pgdg main" > /etc/apt/sources.list.d/pgdg.list'Add Postgresql Key
wget --quiet -O - https://www.postgresql.org/media/keys/ACCC4CF8.asc | sudo apt-key add -sudo apt-get updateInstall Postgresql -9.6 Version
sudo apt-get install postgresql-9.6sudo su postgresCreate Postgres Username and Password.
createuser --username=postgres --no-superuser --pwprompt dspacecreatedb --username=postgres --owner=dspace --encoding=UNICODE -T template0 dspacepsql --username=postgres dspace -c "CREATE EXTENSION pgcrypto;"exitOpen the following postgresql, pg_hba.conf file.
sudo gedit /etc/postgresql/9.6/main/pg_hba.confAdd this below line to the configuration file at the end.
local all dspace md5Restart PostgreSQL
sudo /etc/init.d/postgresql restartsudo useradd -m dspacesudo passwd dspacesudo mkdir /dspacesudo chown dspace /dspacesudo mkdir /buildsudo chmod -R 777 /buildcd /buildDownload the Dspace-6.3 version folder.
wget https://github.com/DSpace/DSpace/releases/download/dspace-6.3/dspace-6.3-src-release.tar.gzUnzip the download Dspace-6.3 version folder.
tar -zxf dspace-6.3-src-release.tar.gz Build the download Dapace-6.3 version folder.
sudo gedit /build/dspace-6.3-src-release/dspace-api/pom.xml[remove 1.4 plugin] line number 103 to 105
<plugin>
<groupId>org.codehaus.mojo</groupId>
<artifactId>buildnumber-maven-plugin</artifactId>
<version>1.4</version>
<executions><execution>
<phase>validate</phase>
<goals>
<goal>create</goal >
</goals>
</execution
</executions>
</plugin>
Installation of DSpace-6.3 version.
cd /build/dspace-6.3-src-releasesudo mvn -U packagecd dspace/target/dspace-installerInstall Apache tomcat-8.5.82
sudo ant fresh_installcd /optTomcat Download file path Location.
sudo wget https://dlcdn.apache.org/tomcat/tomcat-8/v8.5.83/bin/apache-tomcat-8.5.83.tar.gzUnzip the download Tomcat folder.
sudo tar xvzf apache-tomcat-8.5.83.tar.gzRename folder “apache-tomcat-8.5.82” to “tomcat“
Move tomcat folder.
sudo mv apache-tomcat-8.5.83 tomcatTomcat reading permission.
sudo rm apache-tomcat-8.5.83.tar.gzOpen the following file.
sudo gedit /etc/profileAdd following lines at the bottom of the file.
export JAVA_HOME=/usr/lib/jvm/java-8-openjdk-amd64
export CATALINA_HOME=/opt/tomcat
Dspace and Tomcat file configuration Permission.
sudo cp -r /dspace/webapps/* /opt/tomcat/webappsEdit the Tomcat init.d file and Add the Below Scripts.
sudo gedit /etc/init.d/tomcat[add this script]
#!/bin/bash
### BEGIN INIT INFO
# Provides: 		tomcat8
# Required-Start: 	$network
# Required-Stop: 	$network
# Default-Start: 	2 3 4 5
# Default-Stop : 	0 1 6
# Short-Description: Start/Stop Tomcat server
### END INIT INFO

PATH=/sbin:/bin:/usr/sbin:/usr/bin

start() {
sh /opt/tomcat/bin/startup.sh
}

stop() {
sh /opt/tomcat/bin/shutdown.sh
}

case $1 in
  start|stop) $1;;
  restart) stop; start;;
  *) echo "Run as $0 <start|stop|restart>"; exit 1;;
esac
Tomcat permission.
sudo chmod +x /etc/init.d/tomcatsudo update-rc.d tomcat defaultsNow you can Restart Tomcat.
sudo service tomcat startCreate the Dspace Administrator
sudo /dspace/bin/dspace create-administratorIt will ask to enter the email address for user login.
Enter Your email Id : dspace@localhost
first & last name : dspace
password & confirm password : dspace
Continue: Yes
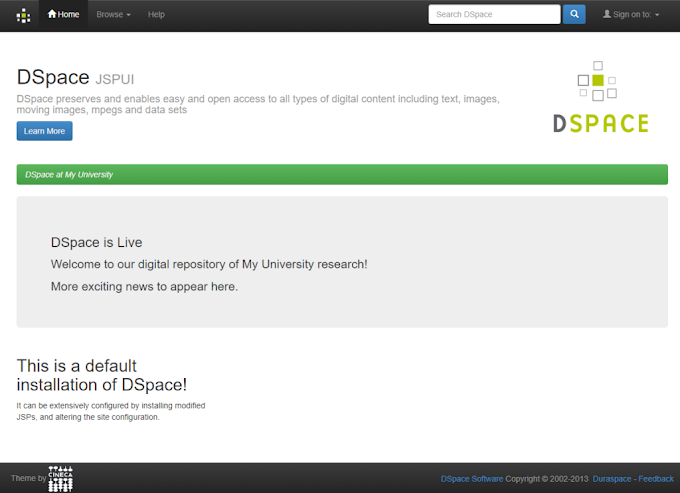
Go to any browser copy and paste the link.
http://localhost:8080/jspui


I hope this tutorial will help you to install the DSpace in Ubuntu MATE22.4 LTS.


409 Comments
gjnetwork - オフショア モバイル アプリ開発サービスの第 1 位 — オフショア モバイル/ウェブ システムの開発は、もはや単なる出費ではありません。今ではやりがいのある投資です。
ReplyDeleteアプリ 開発 オフショア
Click on my this if you are interested (. )( .)
ReplyDeleteAwesome post ! Best Electronics retail software
ReplyDeleteThis particular looks for example certainly superb. Most of these slight tips are made using availablility of cosmetic foundation interest. I like to him or her appreciably. lawyer near me</
ReplyDeleteThis comment has been removed by the author.
ReplyDeleteThis is exceptionally instructive substance and composed well for a change. It's pleasant to see that a few individuals still see how to compose a quality post!
ReplyDeletedigital marketing course
This particular looks for example certainly superb. Most of these slight tips are made using availablility of cosmetic foundation interest. I like to him or her appreciably. online markting
ReplyDeleteVery informative post! There is a lot of information here that can help any business get started with a successful social networking campaign. Christmas Boxes
ReplyDeletedatabasefirm
ReplyDelete/build/dspace-6.3-src-release/dspace/target/dspace-installer/build.xml:789: Java returned: 1
ReplyDeleteسایت جزوه یک ، مرجعی غنی از کتاب های دانشگاهی ، غیر دانشگاهی ، مقالات ، جزوات دانشجویی و کتاب های نایاب و ارزشمند می باشد. سایت جزوه یک با ارائه خدمات بیشمار توانسته جایگاه ویژه ای را در میان سایت های این عرصه برای خود به دست آورد. برای ورود به این کتایخانه غنی از لینک زیر استفاده فرمایید.
ReplyDelete
ReplyDeleteشما در صفحه مربوط به پی دی اف کتاب کنترل کیفیت در آزمایشگاه های پزشکی فریده رضی، از سایت پروژه استور هستید. کتاب کنترل کیفیت در آزمایشگاه های پزشکی نوشته دکتر فریده رضی به عنوان منبعی ضروری برای متخصصان و دانشجویان علوم پزشکی و آزمایشگاهی شناخته می شود.
کنترل کیفی آزمایشگاه pdf
ReplyDeleteریاضی 1 فرامرزی pdf رایگان
شما در صفحه مربوط به پی دی اف کتاب ریاضی عمومی ۱ درسنامه و نکات کلیدی حسین فرامرزی، از سایت پروژه استور هستید.اگر به دنبال پی دی اف کتاب ریاضی عمومی ۱ درسنامه و نکات کلیدی حسین فرامرزی هستید این کتاب یکی از منابع اصلی و معتبر برای یادگیری مفاهیم ریاضی عمومی ۱ است. در این کتاب مفاهیم پیچیده به زبان ساده توضیح داده شده و نکات کلیدی به طور دقیق و کاربردی آورده شده اند.
دانلود رایگان کتاب واژه نامه آلمانی فارسی menschen a1
ReplyDeleteشما در صفحه مربوط به پی دی اف کتاب واژه نامه آلمان-فارسی منشن محمود رضا ولی خانی از سایت پروژه استور هستید. این کتاب یک منبع عالی برای یادگیری زبان آلمانی است. همچنین این کتاب برای کسانی که قصد دارند زبان آلمانی را از سطح مبتدی (A1) شروع کنند طراحی شده است. واژه نامه آلمان-فارسی شامل لغات و اصطلاحات مهم زبان آلمانی همراه با معانی فارسی آن هاست که به زبان آموزان کمک می کند تا دایره واژگان خود را گسترش دهند.
اپلیکیشن تخته نرد وان ایکس برو 1XBoro یکی از ویژگی های این سایت می باشد که با داشتن آپشن های بسیار حرفه ای توانسته محیط جذابی را برای کاربر فراهم کرده است. دانلود این اپلیکیشن یکی از بهترین انتخاب های شما برای شرط بندی خواهد بود که با آن لذت یک شرط بندی فوق العاده را تجربه کنید.
ReplyDeleteاپلیکیشن تخته نرد شرطی
اگر از سایت های شرط بندی پیشنهادی ما برای فعالیت شرط بندی خود استفاده کنید می توانید از اپلیکیشن این سایت ها به صورت رایگان بهره مند شده و از سرعت و کیفیت بالای این اپلیکیشن ها لذت کامل را ببرید.
ReplyDeleteدانلود بازی تخته نرد آنلاین با لینک مستقیم
اپلیکیشن تخته نرد وان ایکس برو 1XBoro یکی از ویژگی های این سایت می باشد که با داشتن آپشن های بسیار حرفه ای توانسته محیط جذابی را برای کاربر فراهم کرده است. دانلود این اپلیکیشن یکی از بهترین انتخاب های شما برای شرط بندی خواهد بود که با آن لذت یک شرط بندی فوق العاده را تجربه کنید.
ReplyDeleteدانلود بازی تخته نرد آنلاین با لینک مستقیم
به دلیل مشکل فیلترینگ در ایران و مشکل ورود کاربران به سایت های شرط بندی مدیران سایت های شرط بندی لینک های بدون فیلتر را در اختیار کاربران خود قرار می دهند که سایت بت فوروارد بدون فیلتر در سریع ترین زمان لینک های بدون فیلتر خود بروز می کنند تا کاربران در ورود به سایت با مشکلی مواجه نشوند.
ReplyDeleteبت فوروارد بدون فیلترشکن
امروزه بیشتر مردم بازی تخته نرد را به صورت شرط بندی بازی میکنند اگر شما نیز علاقه به بازی تخته نرد شرط بندی دارید می توانید از سایت هایی که ما به شما پیشنهاد کرده ایم برای شرط بندی بازی تخته نرد استفاده کنید و خود را با کاربران ایرانی به چالش بکشید.
ReplyDeleteسایت شرط بندی تخته نرد
امروزه بیشتر مردم بازی تخته نرد را به صورت شرط بندی بازی میکنند اگر شما نیز علاقه به بازی تخته نرد شرط بندی دارید می توانید از سایت هایی که ما به شما پیشنهاد کرده ایم برای شرط بندی بازی تخته نرد استفاده کنید و خود را با کاربران ایرانی به چالش بکشید.
ReplyDeleteتخته نرد شرطی
امکان شارژ سریع حساب کاربری و شروع به بازی در کمترین زمان ممکن، یکی از ویژگی های مهم اپلیکیشن tinybet vip است. شما می توانید بلافاصله بعد از شارژ حساب، به بازی های مورد علاقه تان بپردازید و از هیجان و انرژی آن لذت ببرید.
ReplyDeletetinybet vip
ای بی تی ۹۰ (ورود ادرس جدید سایت abt90) اپلیکیشن ای بی تی 90 بدون فیلتر یک سایت پیش بینی فوتبال آنلاین می باشد که سعی کرده است امکان پیش بینی تمامی بازی هایی که در روز دنیا انجام می شود را سایت ای بی تی ۹۰ برای کاربران فراهم کند.
ReplyDeleteای بی تی 90
امروزه با محبوبیت بازی تخته نرد بر روی سایت های شرط بندی مدیران این سایت برای کاربران سایت های خود اپلیکیشن بازی تخته نرد آنلاین شرطی پولی تخته APP بدون اینترنت که با نصب تخته نرد رايگان این اپ را ارائه کرده است که در ادامه به بررسی و معرفی سایت انفجار پولساز و معتبرترین سایت های شرط بندی تخته نرد خواهیم پرداخت.
ReplyDeleteدانلود بازی تخته نرد آنلاین شرطی پولی اندروید
امروزه با محبوبیت بازی تخته نرد بر روی سایت های شرط بندی مدیران این سایت برای کاربران سایت های خود اپلیکیشن بازی تخته نرد آنلاین شرطی پولی تخته APP بدون اینترنت که با نصب تخته نرد رايگان این اپ را ارائه کرده است که در ادامه به بررسی و معرفی سایت انفجار پولساز و معتبرترین سایت های شرط بندی تخته نرد خواهیم پرداخت.
ReplyDeleteدانلود بازی تخته نرد آنلاین با لینک مستقیم
اگر به دنبال یک سایت معتبر و حرفه ای برای تجربه ای هیجان انگیز در دنیای پیش بینی های ورزشی و بازی های کازینویی هستید، سایت شرطبندی یک بت همان جایی است که باید در آن عضو شوید. با ارائه ضرایب بالا، پرداخت های سریع و محیطی امن، سایت بدون فیلتر یک بت توانسته است توجه بسیاری از کاربران حرفه ای را به خود جلب کند.
ReplyDeleteآدرس بدون فیلتر یک بت
اگر به دنبال یک سایت معتبر و حرفه ای برای تجربه ای هیجان انگیز در دنیای پیش بینی های ورزشی و بازی های کازینویی هستید، سایت شرطبندی یک بت همان جایی است که باید در آن عضو شوید. با ارائه ضرایب بالا، پرداخت های سریع و محیطی امن، سایت بدون فیلتر یک بت توانسته است توجه بسیاری از کاربران حرفه ای را به خود جلب کند.
ReplyDeleteبت یک
وقتی صحبت از بونوس های یک سایت شرط بندی می شود ، سایت بت 303 با یاد می آید این سایت در حال ارائه بهترین بونوس ها برای کاربران می باشد که می توانید همیشه به راحتی دریافت کرده و در تمامی بخش های سایت بهره مند شوید ، در bet303 بونوس 20 درصدی برای شارژ می باشد که می توانید بعد از شارژ حساب خود این بونوس را دریافت کنید.
ReplyDeleteسایت شرط بندی با کارت به کارت
وقتی صحبت از بونوس های یک سایت شرط بندی می شود ، سایت بت 303 با یاد می آید این سایت در حال ارائه بهترین بونوس ها برای کاربران می باشد که می توانید همیشه به راحتی دریافت کرده و در تمامی بخش های سایت بهره مند شوید ، در bet303 بونوس 20 درصدی برای شارژ می باشد که می توانید بعد از شارژ حساب خود این بونوس را دریافت کنید.
ReplyDeleteسایت شرط بندی با واریز مستقیم
تاك تيك یکی از سایت های پیشرو در زمینه شرط بندی و پیش بینی ورزشی است که با ارائه انواع بازی های کازینویی و امکان پیش بینی مسابقات ورزشی، به کاربران خود تجربه ای کامل و حرفه ای از دنیای شرط بندی آنلاین ارائه می دهد.
ReplyDeleteسایت تاکتیک
سایت شرط بندی بازی برتر یا همان سبد 724 از سایت های شرط بندی جدید و تازه تاسیس است. سایت شرط بندی بازی برتر فعالیت خود را در زمینه پیشبینی ورزشی در سایت شرط بندی فوتبال بازی برتر و سایت کازینو آنلاین بازی برتر شروع نموده است.
ReplyDeleteسبد 724
دنیای شرط بندی ی آنلاین روز به روز در حال گسترش است و کاربران به دنبال سایت هایی هستند که علاوه بر ارائه ی امکانات ی متنوع، امنیت بالایی نیز داشته باشند. سایت یک بت بدون فیلتر یکی از بهترین گزینه ها برای علاقمندان به پیش بینی ی ورزشی و بازی های کازینویی محسوب می شود. اگر به دنبال یک تجربه ی حرفه ای و سریع هستید، پیشنهاد می کنیم که از طریق ادرس جدید یک بت وارد این پلتفرم شوید و از امکاناتی جذاب آن بهره مند شوید.
ReplyDeleteسایت یک بت بدون فیلتر
اپلیکیشن بت کارت BetCart ورزشی اندروید آیفون برای سایت BetCart بت کارت ارائه شده است.
ReplyDeleteدر هر کجا و هر زمان، تنها با داشتن یک گوشی هوشمند و اینترنت، در سایت BetCart بتکارت شرط بندی و بازی کنید.
betcart
Casino Alanı, Sanal Oyunlar, Bedava Bahisler Ve Daha Birçok Oyunu Bünyesinde Barındıran Online Bahisleri Sizler İçin Eğlenceli Hale Getirmek İçin Çalışıyor. twinplay apk indir Linkine Tıkla Mobil Uygulamayı Hemen İndir.
ReplyDeletetwinplay casino
betine uygulaması İle Birlikte Siz Değerli Bahis Severler İçin Erişim Sıkıntısı Çekmeden Daha Rahat Kullanılabilme İmkanı Sağlanmıştır.
ReplyDeletebetine üye ol
آموزش بازی انفجار + معرفی بازی انفجار + بازی انفجار چیست؟ + بازی پولساز انفجار + ربات بازی انفجار و همه و همه در این مقاله به شما گردآوری شده و به بهترین شکل توضیح داده شده است ، هر آنچه که دنبالش هستید به صورت کامل برایتان گفته میشود تا هیچ ابهامی در مورد بازی پرطرفدار انفجار آنلاین در فکرتان باقی نماند ، کافیست با ما همراه باشید تا به بهترین های بازی انفجار شوید!
ReplyDeleteبازی انفجار
Casino bahis siteleri, kullanıcı dostu arayüzleri ve güvenilir ödeme yöntemleri ile de dikkat çeker. Kullanıcılar, bu sitelerde güvenle bahis yapabilir ve kazançlarını hızlı bir şekilde çekebilirler.
ReplyDeletecasino bahis siteleri listesi
جواد خیابانی(javad Khiyabani)، گزارشگر و مجری برجسته ورزشی ایرانی، بیشتر به دلیل سبک خاص خود در گزارشگری که ترکیبی از شور و هیجان است و گاهی به جنبههای احساسی نیز میپردازد، در میان علاقهمندان فوتبال شناخته شده است.
ReplyDeleteبیوگرافی جواد خیابانی
اگر از کاربران آیفون هستید و به دنبال راهی برای ورود به سایت یک بت بدون نیاز به جستجوی مداوم ادرس جدید یک بت هستید، بهترین گزینه دانلود اپلیکیشن یک بت برای آیفون است. این اپلیکیشن به شما امکان می دهد که در هر زمان و بدون محدودیت، به تمامی بخش های یک بت بدون فیلتر دسترسی داشته باشید. در این مطلب، شما را با مزایا و نحوه دانلود برنامه یک بت برای iOS آشنا خواهیم کرد.
ReplyDeleteورود به سایت یک بت
This comment has been removed by the author.
ReplyDeleteاگر به دنبال یک سایت شرط بندی معتبر و بدون محدودیت دسترسی هستید، سایت بدون فیلتر یک بت انتخابی عالی برای شما خواهد بود. این سایت نه تنها از نظر امنیت و اعتبار در سطح بالایی قرار دارد، بلکه با ارائه آدرس جدید یک بت بدون فیلتر به کاربران خود، دسترسی به تمامی امکانات سایت را بدون دغدغه فراهم می کند. در این مقاله، به بررسی مزایای سایت یک بت بدون فیلتر و ویژگی های برجسته آن خواهیم پرداخت.
ReplyDeleteسایت بدون فیلتر یک بت
سایت شرط بندی اس بت 90 یکی از برترین و شناخته شده ترین بستر های پیش بینی کازینویی است که با توجه به تنوع خوب در بازی ها، علاقه مندان زیادی را به خود جذب کرده است. افراد با ورود به سایت شرط بندی اس بت 90 می توانند متوجه تفاوت های این بستر با دیگر سایت های ارائه دهنده شرط بندی شوند. این موضوع به خاطر این است که تیم طراحی و برنامه نویسی که در اس بت در حال فعالیت هستند جزو بهترین ها می باشند.
ReplyDeleteسایت اس 90
سایت اس بت ۹۰ acebet
ReplyDeleteادرس جدید سایت اس نود
اپلیکیشن آس 90 بت نسخه اندرویدی دارد که به راحتی بر روی موبایل های اندرویدی قابل نصب است و به شما امکاناتی را می دهد که بتوانید خیلی راحت و بدون هیچ مشکل فیلترینگی وارد سایت Ace90Bet شوید. این اپلیکیشن به دلیل سرعت بسیار بالا ریسک شما را پایین تر می آورد.🏆🎰🎱🏆🎰🎱
سایت اس بت 90
ReplyDeleteادرس سایت ace90
به دلیل مشکل فیلترینگ سایت شرط بندی اس 90 بعد از فیلتر شدن آدرس بدون فیلتر سایت آدرس جدیدی را انتشار می دهد.
اس بت 90 (Ace90Bet) یک سایت شرط بندی آنلاین است که به کار بران امکان شرط بندی در بازی های کازینویی و پیش بینی مسابقات ورزشی را می دهد.
ReplyDeleteادرس جدید سایت اس نود
اگر شما هم به دنبال یک تجربه جدید و هیجان انگیز در دنیای شرط بندی آنلاین هستید، یک بت تلگرام می تواند راهی عالی برای دسترسی به خدمات این سایت باشد. با استفاده از تلگرام، می توانید به راحتی از آخرین اخبار و تغییرات سایت یک بت آگاه شوید و همچنین از امکانات ویژه ای که این سایت برای کاربران خود فراهم کرده است، بهره مند شوید. به کمک یک بت تلگرام به راحتی می توانید با جامعه کاربران در ارتباط باشید و سوالات خود را مطرح کنید.
ReplyDeleteیک بت تلگرام
اعتبار سایت یک بت یکی از مسائلی است که به شدت برای کاربران اهمیت دارد. اگر شما به دنبال یک سایت شرط بندی معتبر هستید، مطمئناً یک بت می تواند انتخاب مناسبی باشد. این سایت با ارائه خدمات متنوع و پشتیبانی 24 ساعته، توانسته است جایگاه خوبی در میان کاربران پیدا کند. yekbet سایت به دلیل اعتبار بالا و ارائه تجربه ای ایمن برای کاربران، یک گزینه عالی برای شرط بندی آنلاین به شمار می رود.
ReplyDeleteاعتبار سایت یک بت
اگر به بازی های فکری و استراتژیک علاقمند هستید، تخته نرد در سایت یک بت یکی از بهترین گزینه ها برای شما خواهد بود. این بازی سنتی و محبوب، علاوه بر هیجان و سرگرمی، امکان کسب درآمد را نیز برای کاربران فراهم می کند. با ورود به این سایت، شما می توانید در فضایی حرفه ای و رقابتی، با بازیکنان واقعی از سراسر دنیا بازی کنید و مهارت های خود را به چالش بکشید.
ReplyDeleteسایت یک بت
اگر می خواهید در دنیای شرط بندی موفق باشید و از سرمایه ی خود به بهترین شکل ممکن استفاده کنید، مدیریت سرمایه در یک بت یکی از مهم ترین اصولی است که باید آن را رعایت کنید. بسیاری از کاربران بدون داشتن یک استراتژی مناسب، تمامی موجودی خود را در مدت کوتاهی از دست می دهند. اما با یادگیری روش های مدیریت سرمایه، می توانید ریسک را کاهش دهید و سودآوری بلند مدت داشته باشید. سایت یک بت بدون فیلتر این امکان را فراهم کرده است که کاربران با برنامه ریزی دقیق، شرط بندی های خود را انجام دهند و به سوددهی پایدار برسند.
ReplyDeleteسایت یک بت بدون فیلتر
اگر به دنبال یک تجربه هیجان انگیز در دنیای شرط بندی آنلاین هستید و می خواهید سایتی را پیدا کنید که هم امکانات حرفه ای داشته باشد و هم دسترسی راحتی برای کاربران فراهم کند، سایت شرطبندی یک بت می تواند انتخاب مناسبی برای شما باشد. این سایت با طراحی کاربر پسند و خدمات متنوع، توانسته توجه علاقمندان به پیش بینی ورزشی و بازی های کازینویی را به خود جلب کند. امکاناتی مانند نسخه موبایلی، پشتیبانی سریع و آدرس های بدون فیلتر، از ویژگی هایی هستند که باعث محبوبیت بیشتر یکبت در میان کاربران شده است.
ReplyDeleteسایت شرطبندی یک بت
سایت بت فوروارد یکی از سایت های معتبر پیش بینی رشته های ورزشی و شرط بندی بازی های کازینویی می باشد. در سایت شرط بندی BetForward، این امکان به کاربران این سایت داده می شود که هرگونه پیش بینی ورزشی در انواع رشته های ورزشی مانند فوتبال، والیبال ، بسکتبال و هندبال و… انجام دهند.
ReplyDeleteادرس جدید بت فوروارد بدون فیلتر شکن
سایت مگاپاری megapari وب سایت مدرن در حوزه شرط بندی پیش بینی و سایت شرط بندی انفجار می باشد که سایت مگاپاری با ورود به این عرصه کاربران بسیار زیادی را جذب خود نمود و با داشتن واریز و برداشت های سریع و واریز های معتبر به مشتریان خود megapari سایت به شهرت رسیده است. در نتیجه بهترین گزینه برای کاربرانی که می خواهند به صورت حرفه شرط بندی کنند سایت شرط بندی مگاپاری می باشد.
ReplyDeleteسایت مگاپاری
بیوگرافی جیسون تیتوم
ReplyDeleteکارنامه خورش pdf
ReplyDeleteااگر در هنگام استفاده از یک سایت شرطبندی، پشتیبانی قوی و پاسخ گویی سریع برایتان اهمیت دارد، بدون شک پشتیبانی یک بت می تواند تجربه ای قابل اعتماد و حرفه ای برایتان رقم بزند. تیم پشتیبانی یک بت به صورت بیست و چهار ساعته آماده پاسخ گویی به سوال ها و حل مشکل های کاربران است. این موضوع برای کاربرانی که به دنبال یک تجربه بی دغدغه هستند، بسیار مهم و حیاتی به شمار می رود.
ReplyDeleteپشتیبانی یک بت
اگر به دنبال یک تجربه حرفه ای و بی دردسر در دنیای شرط بندی هستید، اولین قدم ثبت نام در سایت یک بت است. فرآیند ثبت نام به گونه ای طراحی شده که هم سریع و هم امن باشد. از همان لحظه ورود به سایت یک بت می توانید مطمئن باشید که با یک محیط حرفه ای و ساده روبرو خواهید شد که برای راحتی کاربران طراحی شده است. این موضوع باعث می شود حتی کاربران تازه وارد نیز به راحتی بتوانند ثبت نام خود را انجام دهند و از امکانات متنوع سایت استفاده کنند.
ReplyDeleteورود به سایت یک بت
سایت شرط بندی وان ایکس برو،امکان دانلود بازی 21 پاسور برای اندروید را مهیا کرده است و شما عزیزان می توانید این بازی هیجان انگیز را از طریق اپلیکیشن 1xboro و بدون نیاز به استفاده از هرگونه فیلترشکن و یا وی پی ان و با سرعتی به مراتب بیشتر از سایت های شرط بندی بازی کرده و لذت ببرید.
ReplyDeleteبازی ۲۱ پاسور برای اندروید
https://woon303.com/
ReplyDeletebetwoon
https://303bahis.vip/
ReplyDeletebedava bonus veren bahis siteleri 2025
ای بی تی 90 یکی از سایت های شرط بندی ایرانی است که توسط ساشا سبحانی اداره می شود. سایت شرط بندی ساشا سبحانی یکی از قدیمی ترین کازینو های آنلاین ایرانی بوده که در این زمینه فعالیت می کند. ای بی تی 90 را می توان یکی از سایت های قدیمی در زمینه شرط بندی برای علاقمندان معرفی کرد.
ReplyDeleteای بی تی
ای بی تی 90 یکی از سایت های شرط بندی ایرانی است که توسط ساشا سبحانی اداره می شود. سایت شرط بندی ساشا سبحانی یکی از قدیمی ترین کازینو های آنلاین ایرانی بوده که در این زمینه فعالیت می کند. ای بی تی 90 را می توان یکی از سایت های قدیمی در زمینه شرط بندی برای علاقمندان معرفی کرد.
ReplyDeleteabt90 bet
بیوگرافی کریم انصاریفرد
ReplyDeleteسایت بیوگرافی فوتبال، بیو فوتبالی برای شما بیوگرافی وویچک شزنی را آماده کرده است. برای ادامه این مطلب با سایت بیوگرافی فوتبال همراه باشید.
ReplyDeleteشزنی و همسرش
بیوگرافی رافینیا رافائل دیاز بلولی (به پرتغالی: Raphael Dias Belloli)، که به نام رافینیا شناخته میشود. در این نوشته وب سایت بایر لورکوزن ایران شما را با رافینیا ، ستاره برزیلی فوتبال جهان، آشنا خواهد کرد، همراه ما بمانید.
ReplyDeleteعکس رافینیا
آیا به دنبال آموزش ساده و گام به گام برای ثبت نام در سایت یک بت هستید؟ این مقاله می تواند راهنمایی مفید برای شما باشد تا به راحتی در این سایت ثبت نام کنید و از آدرس بدون فیلتر یک بت استفاده کنید. سایت یک بت یک پلتفرم محبوب برای علاقمندان به شرط بندی و پیش بینی مسابقات ورزشی است که با ارائه خدمات متنوع و کیفیت بالا، توانسته است محبوبیت زیادی در بین کاربران کسب کند. در این آموزش، شما را با مراحل ثبت نام در سایت یک بت آشنا خواهیم کرد.
ReplyDeleteآدرس بدون فیلتر یک بت
س بت بدون فیلتر
ReplyDeleteسایت بدون فیلتر ace90
ادرس جدید سایت اس نود
ورود به سایت اس نود
سایت بدون فیلتر اس 90
ace90bet بدون فیلتر
امنیت و اعتبار سایت شرطبندی اس بت 90
ReplyDeleteace90bet ثبت نام
ورود به آس بت 90
اپلیکیشن موبایل اس بت 90
ac90bet
سایت شرط بندی تاکتیک بت ( سایت تیک تاک اصلی ) TakTik Bet بدون فیلتر سایت تیک تاک بت ورود به سایت تاک بت 90 از دیگر سایت های شرط بندی به زبان فارسی برای ایرانیان است که با قالب مشابه به سایت های قدیمی است که در اوایل شرط بندی و پیش بینی مسابقات در ایران برای اولین بار توسط سایت های آنلاین به وجود آمده بود.
ReplyDeleteسایت شرط بندی تیک تاک
سایت شرط بندی تاکتیک بت ( سایت تیک تاک اصلی ) TakTik Bet بدون فیلتر سایت تیک تاک بت ورود به سایت تاک بت 90 از دیگر سایت های شرط بندی به زبان فارسی برای ایرانیان است که با قالب مشابه به سایت های قدیمی است که در اوایل شرط بندی و پیش بینی مسابقات در ایران برای اولین بار توسط سایت های آنلاین به وجود آمده بود.
ReplyDeleteسایت تاکتیک
Sinan engin in biyografisi
ReplyDeletesinan engin kaç yaşında
sinan engin nereli
sinan engin serveti
sinan engin mal varlığı
Sinan engin
kostic
ReplyDeletefilip kostic evli mi
kostic evli mi
kostic nereli
Filip kostic in biyografisi
بت فوروارد
ReplyDeleteورود بت فوروارد
دانلود اپلیکیشن بت فوروارد برای اندروید
betforward
بیوگرافی استیون انزونزی
ReplyDeletebetin bahis
ReplyDeletebetine guncel giris
betine casino
bet ine casino
betine güncel
betine bahis
betpuan giriş
ReplyDeletebetpuan güncel giriş
betpuan güvenilir mi
betpuan kayıt
betpuan üye ol
betpuan
norabahis güncel giriş
ReplyDeletenorabet
norabahis indir
norabahis casino
norabahis
diyar bet giriş
ReplyDeletediyarbet giriş güncel
diyarbet casino
dünyanın en iyi bahis sitesi
diyarbet güncel giriş
marsbahis giriş qr
ReplyDeletemarsbahis indir
marsbahis giriş
marsbahis güncel giriş
سایت هات بت بدون فیلتر شکن طراحی شده تا کاربران ایرانی بتوانند بدون محدودیت های معمول اینترنتی و بدون نیاز به استفاده از وی پی ان یا پراکسی، مستقیم به خدمات سایت دسترسی پیدا کنند. این موضوع به خصوص برای کاربرانی که با مشکلات سرعت اینترنت و قطعی های ناشی از فیلترشکن مواجه اند، اهمیت زیادی دارد. نسخه های بدون فیلتر سایت اغلب به صورت مداوم به روز رسانی می شوند و از طریق صفحات رسمی دنیا جهانبخت یا کانال های ارتباطی سایت در دسترس قرار می گیرند. این نسخه ها دارای همه امکانات نسخه اصلی هستند، از جمله پیش بینی زنده، بازی های کازینویی، درگاه پرداخت ریالی، پشتیبانی ۲۴ ساعته و اپلیکیشن اختصاصی.
ReplyDeleteهات بت بدون فیلتر شکن
سایت دنیا جهانبخت که با نام هات بت شناخته می شود، یکی از سایت های پرطرفدار شرط بندی در ایران است. نسخه بدون فیلتر این سایت به طور مرتب از طریق کانال های رسمی یا پیج اینستاگرام دنیا جهانبخت منتشر می شود. کاربران با استفاده از این لینک ها می توانند بدون نیاز به فیلترشکن وارد سایت شوند و از امکانات متنوع آن استفاده کنند. سایت دنیا جهانبخت بدون فیلتر شامل بخش های مختلفی مانند پیش بینی ورزشی، بازی های کازینویی و بونوس های ویژه است. دسترسی آسان و محیط کاربری روان از دلایل محبوبیت این سایت در میان کاربران ایرانی است.
ReplyDeleteسایت دنیا جهانبخت بدون فیلتر
سحرخیزان
ReplyDeleteسعید سحرخیزان (saeed saharkhizan) متولد ۵ تیر ۱۳۸۲ بازیکن فوتبال اهل ایران است که در پست مهاجم برای باشگاه فوتبال اورنبورگ در لیگ برتر فوتبال روسیه بازی می کند. در این نوشته وب سایت الاتحاد ایران شما را با سعید سحرخیزان، ستاره فوتبال جهان، آشنا خواهد کرد. همراه ما بمانید.
بیوگرافی میکی فن دی فن
ReplyDeleteمیکی فن دی فن (Micky van de Ven) بازیکن فوتبال اهل هلند است که در پست مدافع میانی برای باشگاه تاتنهام هاتسپر در لیگ برتر انگلستان بازی میکند. او در ۱۹ آوریل ۲۰۰۱ در ورمر، هلند به دنیا آمد .
alev casino
ReplyDeletealev casino giriş
alevcasino giriş güncel
اشکان دژاگه اصالتا اهل کجاست
ReplyDeleteاشکان دژاگه متولد ۱۳۶۵ در تهران، فوتبالیست ایرانی آلمانی است که در پست هافبک بازی کرده و سابقه حضور در تیم ملی ایران و باشگاههایی مانند وولفسبورگ و هرتابرلین را دارد. او در جام جهانی ۲۰۱۴ برای ایران به میدان رفت و همراه با خانوادهاش در آلمان زندگی میکند. در این نوشته وب سایت بایرن مونیخ شما را بااشکان دژآگه، ستاره فوتبال جهان، آشنا خواهد کرد. همراه ما بمانید.اشکان دژاگه اصالتا اهل کجاست
پائولو فونسکا
ReplyDeleteپائولو فونسکا(Paulo Fonseca) متولد 5 مارس 1973 در شهر نامپولا از کشور پرتغال است. وی بازیکن حرفه ای سابق و مربی کنونی فوتبال اهل پرتغال است. در این نوشته وب سایت الاتحاد ایران شما را با پائولو فونسکا ، ستاره فوتبال جهان، آشنا خواهد کرد. همراه ما بمانید.
پائولو فونسکا
ReplyDeleteپاتریک فوتبالیست
پاتریک برگ یک فوتبالیست حرفه ای نروژی است که به عنوان هافبک دفاعی برای باشگاه لنز لیگ 1 بازی می کند. برای مشاهده با عکس های فوتبالی همراه باشید
فروشگاه اینترنتی خرید کالا و نرم افزار سایت سبد 724 Sabad فروشگاه سایت شرط بندی فوتبال سبد اولین فروشگاه اینترنتی عرضه نرم افزار به صورت مجازی می باشد که کلیه کاربران سبد724 می توانند نسخه اصلی نرم افزارهای مورد نیاز خود را خریداری نموده و بر روی سرور قدرتمند وب سایت سایت سبد۷۲۴ دریافت نمایند.
ReplyDeletesabad724
آرتورو وویدال(Arturo Vidal) بازیکن فوبال اهل شیلی که در سال ۲۲ مه ۱۹۸۷ به دنیا آمد. او برای تیم ملی برزیل با پست هافبک میانی بازی می کند. او از مهمترین بازیکنان فوتبال شیلیایی است. در این نوشته وب سایت الاتحاد ایران شما را با آرتور ویدال ، ستاره فوتبال جهان، آشنا خواهد کرد. همراه ما بمانید.
ReplyDeleteویدال در پرسپولیس
بیوگرافی سرخیو راموس
ReplyDeleteسرخیو راموس (Sergio Ramos) که به عنوان یکی از بهترین مدافعان تاریخ فوتبال شناخته میشود، به خاطر مهارتهای فوقالعادهاش در انجام تکلهای مؤثر شهرت دارد.
کتابخانه نیمه شب مت هیگ که در سال ۲۰۲۰ منتشر شد، به سرعت تبدیل به یکی از پرفروش ترین کتاب ها در دنیا شد و تحسین های زیادی را از منتقدان و خوانندگان دریافت کرددانلود pdf کتاب کتابخانه نیمه شب
ReplyDeleteبیوگرافی جک گریلیش
ReplyDeleteجک گریلیش (Jack Grealish)، فوتبالیست سرشناس انگلیسی، متولد سال ۱۹۹۵ است و در حال حاضر ۲۷ سال سن دارد.
بیوگرافی لیساندرو مارتینز
ReplyDeleteلیساندرو مارتینز یکی از برترین فوتبالیستهای مدرن است که با پشتکار و ارادهای بینظیر، از محلهای ناشناخته در آرژانتین به بزرگترین جایگاه فوتبال دنیا رسید. او که بازیکن اژاکس بوده در حال حاظر برای منچستر بازی میکند .
سایت شرط بندی بت برو بدون فیلتر BETBORO اپلیکیشن ورود آدرس جدید سایت بتبرو هميشه آماده است تا خدمات با كيفيت به شما ارائه دهد كه به صورت بهبود مداوم، بهينه سازی سايت، پيشنهادات جالب، اخبار، پیش بینی زنده، درجه بندی يا آمار جلوه می كند.
ReplyDeletebetboro سایت
سیب بت محبوب ترین کازینو پارسی زبانان است که در طول فعالیت خود از بدو ورود به دنیای سایت های شرط بندی فارسی معتبر موفق بوده و توانسته اعتماد کاربران خود را به دست آورد.
ReplyDeleteبا شرط بندی و پیش بینی در سایت سیب بت ، قدرت پرداخت سریع جوایز ، هیجان واقعی کازینو ، پیش بینی های سریع با سرعت بسیاربالا را در بین حرفه ای ترین ها تجربه خواهید کرد.
sibbet دانلود
betexper
ReplyDeletebetexper güvenilir mi
https://betexper.bet
BetExper İndir seçeneğiyle bahis keyfini cebine taşı! Artık bilgisayar başında saatler harcamana gerek yok; BetExper’in mobil uygulaması sayesinde kuponlarını nerede olursan ol saniyeler içinde oluşturabilirsin. Yüksek oranlı maçlar, hızlı para çekme sistemi ve canlı casino odaları bir tık uzağında.
https://jet-theme.com/downloads/dairatol-maaref/
ReplyDeleteوب سایت جت تم فایل کتاب دایرهالمعارف هنر اثر رویین پاکباز را در سایت قرار داده است. این کتاب به بررسی جامع و دقیق هنر در طول تاریخ میپردازد. رویین پاکباز در این کتاب با استفاده از تحقیقات گسترده و تحلیلهای عمیق، خواننده را با جنبههای مختلف هنر از جمله نقاشی، مجسمهسازی، معماری و هنرهای تجسمی آشنا میکند. این کتاب در 1200 صفحه به رشته تحریر درآمده و به تمامی شما عزیزان تقدیم میگردد.
دانلود رایگان کتاب دایره المعارف هنر رویین پاکباز pdf
pdf بی حد و مرز رایگان با زبانی ساده و روشی جذاب، به شما نشان میدهد که چگونه میتوانید به موفقیتهای بیشتری دست پیدا کنید. به راحتی میتوانید نسخه PDF آن را دریافت کنید.
ReplyDeleteدانلود کتاب بی حد و مرز رایگان
مزیت استفاده از اپلیکیشن تک بت TakBet فیلتر نبودن آن است چون دسترسی هر کسی از سایت قطع شود در همان زمان آدرس جدید تک بت در برنامه بارگذاری می شود. شما میتوانید با اپلیکیشن تک بت با سرعت بالایی ثبت نام کنید.
ReplyDeletetakbet
مزیت استفاده از اپلیکیشن تک بت TakBet فیلتر نبودن آن است چون دسترسی هر کسی از سایت قطع شود در همان زمان آدرس جدید تک بت در برنامه بارگذاری می شود. شما میتوانید با اپلیکیشن تک بت با سرعت بالایی ثبت نام کنید.
ReplyDeleteتک بت ورود</a
لیونل مسی ( Lionel Messi ) یک فوتبالیست حرفهای آرژانتینی است که به عنوان مهاجم برای تیم ملی فوتبال اینتر میامی و تیم ملی فوتبال آرژانتین بازی میکند و کاپیتان آن است . در این نوشته وب سایت بایر لورکوزن ایران شما را با لیونل مسی ، بازیکن تمام دوران، آشنا خواهد کرد، همراه ما بمانید.
ReplyDeleteقد مسی
ابراهیما کوناته ایبراهیما کوناته متولد ۲۵ مه ۱۹۹۹ یک بازیکن حرفهای فوتبال فرانسوی است که به عنوان مدافع میانی برای باشگاه لیورپول در لیگ برتر و تیم ملی فرانسه بازی میکند. در این نوشته وب سایت اینتر میلان شما را با ابراهیما کوناته ، ستاره فوتبال جهان، آشنا خواهد کرد. همراه ما بمانید.
ReplyDeleteابراهیم کوناته سن
داروین گابریل نونیز ریبیرو که به اسم داورین نونیز شناخته میشود فوتبالیست اهل اروگوئه است که در باشگاه فوتبال لیورپول فعالیت دارد. در این نوشته وب سایت بایر لورکوزن ایران شما را با داروین نونیز ، یکی از بهترین مهاجمان فوتبال جهان، آشنا خواهد کرد، همراه ما بمانید.
ReplyDeleteداروین نونیز و همسرش
سایت بیوگرافی فوتبال، بیو فوتبالی برای شما بیوگرافی سرخیو آگوئرو را آماده کرده است. سرخیو آگوئرو متولد 2 ژوئن 1988 در آرژانتین ، بازیکن فوتبال در پست مهاجم است. بصورت جدی از 8 سالگی با تشویق پدرش فوتبال را شروع کرد و حالا با 173 سانتی متر قد و 77 کیلوگرم وزن ، بازیکن تیم ملی آرژانتین و بارسلونای اسپانیست. برای ادامه این مطلب با سایت بیوگرافی فوتبال همراه باشید.
ReplyDeletebسرخیو آگوئرو قد
شروین بزرگ متولد 27 فروردین 1371 در رشت، فوتبالیست است فوتبال را از کودکی آغاز کرد و در 28 سالگی به «فولاد خوزستان» پیوست و هم اکنون در پست مهاجم برای تیم «مس کرمان» به میدان میرود.
ReplyDeleteشروین بزرگ
پی دی اف کتاب ارثیه هاثورن
ReplyDeleteوب سایت اسکریپت یک کتاب میراث هاثورن اثر جنیفرلین بارنز با حجم ۳۴۶ صفحه را برای شما عزیزان آماده کرده است.موضوع اصلی این کتاب حل کردن معماها و رمزهایی است که توبیاس هاثورن در میراث خود برای اِیوری و خانوادهاش به جا گذاشته. اِیوری باید با چهار نوهٔ هاثورن مواجه شود، که هر کدام از آنها به نوعی با او رقابت میکنند و سعی دارند از انگیزههای واقعی توبیاس پرده بردارند.
مارکوس آواس کوریا(Marcos Aoás Corrêa) که با نام مارکینیوس شناخته می شود،مدافع اهل برزیل است که اکنون برای باشگاه فوتبال پاری سن ژرمن و تیم ملی برزیل بازی می کند. در این نوشته وب سایت الاتحاد ایران شما را با مارکوس آواس کوریا، ستاره فوتبال جهان، آشنا خواهد کرد. همراه ما بمانید.
ReplyDeleteآمار مارکینیوس
صالح حردانی بازیکن فوتبال ایرانی است که در پست مدافع راست بازی میکند او به عنوان یکی از استعدادهای جوان فوتبال ایران شناخته میشود و در لیگ برتر ایران و برای تیمهای مختلفی بازی کرده است. در این نوشته وب سایت بایرن مونیخ شما را با صالح حردانی، ستاره فوتبال جهان، آشنا خواهد کرد، همراه ما بمانید.
ReplyDeleteشماره صالح حردانی
لویزا لیپمن در تاریخ ۲۳ سپتامبر ۱۹۹۴ در شهر هرنه (Herne) آلمان متولد شد. او از همان کودکی علاقه زیادی به ورزش داشت، اما نه فقط به والیبال؛ بلکه بسکتبال، هندبال و شنا هم بخشی از روزمرهاش بودند. خانوادهاش از قشر متوسط جامعه آلمان بودند و همیشه از تلاشهایش حمایت کردند. مربیان ابتداییاش میگویند که از همان ابتدا «سرسخت، متمرکز و بیرحم در زمین بازی» بود.
ReplyDeleteبیوگرافی لویزا لیپمن
کیلا آلوس در ۸ ژانویه ۲۰۰۰ در شهر پراسا کابرا (Praça Cabrália) در ایالت پاراíba کشور برزیل به دنیا آمد. او در خانوادهای ورزشی به دنیا آمد و خواهر دوقلویش Keyt Alves نیز والیبالیست حرفهای است. مادرش از ابتدا پشتیبان فعالیتهای ورزشی فرزندانش بود و همیشه در مصاحبهها میگوید: «ما بچههایمان را طوری تربیت کردیم که هم رؤیا ببینند و هم برایش بجنگند.» پدر خانواده هم در گذشته فوتبالیست آماتور بوده و همین باعث شده عشق به ورزش در خانهشان جریان داشته باشد.
ReplyDeleteبیوگرافی کیلا آلوس
کلسی رابینسون در ۲۵ ژوئن ۱۹۹۲ در شهر الیهتا (Elmhurst) ایالت ایلینوی آمریکا به دنیا آمد. او در خانوادهای با روحیه ورزشی بزرگ شد و پدر و مادرش همواره از علاقهمندی او به ورزش حمایت میکردند. از کودکی انرژی بالایی داشت و به چند رشتهی ورزشی از جمله دوومیدانی، بسکتبال و والیبال علاقهمند بود.
ReplyDeleteبیوگرافی کلسی رابینسون
یولیا گراسیمووا در تاریخ ۱۵ سپتامبر ۱۹۸۹ در شهر بندری اودسا در جنوب اوکراین به دنیا آمد. او از همان کودکی انرژی زیادی داشت و خانوادهاش خیلی زود متوجه علاقهاش به ورزش شدند. با وجود شرایط اقتصادی نسبتاً سخت در دهه ۹۰ میلادی، پدر و مادرش تمام تلاششان را کردند تا یولیا بتواند در کلاسهای ورزشی شرکت کند.
ReplyDeleteبیوگرافی یولیا گراسیمووا
This comment has been removed by the author.
ReplyDeletecapitolbet Yüksek oranları ve zengin oyun seçenekleriyle capitolbet heyecan arayanlar için ideal bir adres haline geliyor. Güvenli altyapısı ve kullanıcı dostu arayüzüyle öne çıkan site, sorunsuz bir deneyim sunuyor. Canlı bahis ve casino kategorilerinde fark yaratmayı başaran bu platform, her zevke hitap ediyor.
ReplyDeletecapitolbetgiriş
CasintroBet Giriş ile Oyuna Şık Bir Başlangıç Yap! Güncel adresimiz sayesinde CasintroBet’e saniyeler içinde bağlanabilirsin. Modern arayüzü, yüksek kazanç fırsatları ve özel oyunlarla dolu bir dünya seni bekliyor. Engellemeleri düşünmeden, güvenli ve hızlı giriş ayrıcalığını her an yaşa.
ReplyDeletecasintro bet güncel giriş
ماریافه آرتاچو دل سولار در بیستودوم اکتبر ۱۹۹۳ در شهر لیما، پایتخت پرو به دنیا اومد. اما سرنوشت طوری رقم خورد که هنوز کودک بود که با خانوادهاش به استرالیا مهاجرت کرد و زندگی تازهای رو اونجا آغاز کرد. شاید برای کسی که در لیما به دنیا اومده و به سواحل گرم اقیانوس آرام عادت داره، والیبال ساحلی یک انتخاب طبیعی باشه، اما برای ماریافه این ورزش در استرالیا معنای تازهای گرفت. از همون دوران نوجوانی، به شکل حرفهای تمرین کرد و خیلی زود استعدادش رو نشون داد.
ReplyDeleteبیوگرافی ماریافه دل سولار
کیلا سیمونز در ۲۸ سپتامبر ۱۹۹۵ در گینزویل، فلوریدا متولد شد. او در دبیرستان P.K. Yonge فعالانه والیبال بازی میکرد و سپس با بورس کامل در رشته ورزش به دانشگاه مارشال وارد شد. او در آنجا به تیم پرشور والیبال دانشگاه پیوست و در طول چهار سال حضورش رکورددار پاسها و دریافتها شد، با میانگین تقریباً ۹ پاس در هر ست . این تجربه آکادمیک و ورزشی آیندهاش را پایهریزی کرد.
ReplyDeleteبیوگرافی کیلا سیمونز
برندهای ورزشی و محصولات مرتبط با سلامت و سبک زندگی سالم، از ماریافه بهعنوان سفیر استفاده میکنن. او در کمپینهای تبلیغاتی شرکتهای بزرگی چون Asics، Gatorade و برندهای محلی استرالیایی حضور داشته. زیبایی طبیعی، فرم بدنی متناسب و چهره خندان او، باعث شده رسانهها علاقه زیادی به همکاری باهاش نشون بدن. او حتی چندبار به عنوان "یکی از زیباترین زنان ورزشکار استرالیا" معرفی شده
ReplyDeleteحواشی ماریافه دل سولار
کیلا در ویدیوهای پشتصحنه عکاسیها، حضور دارد و مخاطبانش را با چالشهای مدلسازی آشنا میکند؛ مثل موقعیتهای نامناسب، بالانسی که از بین میرود، یا عکسهایی که نیازی به حذفشان نیست! . همچنین او در ویدیوهایی در کنار ساحل عکس میگیرد و حتی در شیم کردن سفر غواصی کنار کوسهها حضور دارد .
ReplyDeleteحواشی کیلا سیمونز
در سال ۲۰۱۳، ژاکلین باردار شد و با تولد پسرش آرتور در دسامبر همان سال، به یک تصویر الهامبخش تبدیل شد . تنها چند ماه بعد، با بازگشت سریع به تیم ملی، تیم را به کسب مدال برنز قهرمانی جهان در ۲۰۱۴ هدایت کرد؛ اتفاقی که نامش را در کنار مادر-قهرمانان ورزش برزیل ثبت کرد.
ReplyDeleteعکس های ژاکلین کاروالیو
masterbet aviator
ReplyDeletemasterbet turkey giriş
masterbet giriş adresi
دانلود اپلیکیشن دنس بت یکی از راه های دسترسی به بازی انفجار دنس است که تجربه ای هیجان انگیز از شرط بندی آنلاین را ارائه می دهد. برای دانلود این بازی، می توانید به وب سایت های معتبر شرط بندی مراجعه کنید که این بازی را پشتیبانی می کنند
ReplyDeletedance bet
سایت YekBet از جمله پلتفرم هایی است که روش های متنوعی برای برداشت وجه در اختیار کاربران قرار می دهد. این تنوع باعث شده کاربران با توجه به ترجیحات شخصی و شرایط خود، بتوانند راحت ترین گزینه را انتخاب کنند. در حال حاضر، روش هایی مانند شماره شبا بانکی و پرفکت مانی از پرکاربردترین گزینه ها در این سایت هستند.
ReplyDeleteآموزش برداشت از حساب YekBet
سایت شرط بندی یک بت یکی از شناخته شده ترین و معتبرترین پلتفرم های شرط بندی آنلاین برای کاربران فارسی زبان است. این سایت با خدمات متنوع، رابط کاربری آسان و محیطی امن توانسته توجه بسیاری از علاقه مندان به پیش بینی ورزشی و بازی های کازینویی را جلب کند. بسیاری از کاربران حرفه ای و حتی تازه واردها، یک بت را به عنوان گزینه اول خود انتخاب می کنند.
ReplyDeleteسایت یک بت yekbet
سيري در دوم سپتامبر ۱۹۸۳ در تروندهایم نروژ متولد شد. با وجود اینکه فرهنگ ساحلی در نروژ کمتر است، او از سنین نوجوانی به والیبال ساحلی علاقهمند شد و تصمیم گرفت مسیر متفاوتی را انتخاب کند. شهری نیمهساحلی، خانوادهای معمولی و علاقه به ورزش، نخستین سرمایههای او برای ورود به والیبال ساحلی حرفهای را شکل دادند .
ReplyDeleteبیوگرافی سیری بیورکست
وینیفر ماریا فرناندز پرز در ۶ ژانویه ۱۹۹۵ در سانتیاگو د لوس کابایروس، جمهوری دومینیکن، به دنیا آمد و قد ۱.۶۹ متریاش هیچگاه مانع حضور تأثیرگذارش در زمین نشد. او از دهسالگی در باشگاه محلی سانتیاگو زیر نظر مربی میگل دوران والیبال را آغاز کرد و با سرعتی غیرمنتظره به تیم ملی جوانان رسید .
ReplyDeleteبیوگرافی وینیفر فرناندز
لورا در ۱۳ ژانویه ۱۹۸۶ در شرق برلین (دیوار برلین سابق) به دنیا آمد؛ روزگاری که امکانات ورزشی محدود بود، اما او از کودکی علاقهمند به والیبال شد. پس از تجربه اولیه در تیمهای داخلی، در سال ۱۹۹۹ به ورزش ساحلی روی آورد و خیلی زود مسیرش را با مربیگری دقیق و انتخابهای هوشمندانه آغاز کرد. توانایی فنیاش از همان ابتدا برای مربیان مشهود بود و اولین مدالهای اروپایی سطح پایه را دریافت کرد.
ReplyDeleteبیوگرافی لورا لودویگ
تالیتا آنتونس در ۲۹ آگوست ۱۹۸۲ در آکیدوآنا، ایالت ماتو گروسو دو سول برزیل به دنیا آمد. او با قد ۱٫۸۰ متر و وزن نزدیک به ۶۴ کیلوگرم، از همان دوران نوجوانی نشان داد که آمادگی ذهنی و فیزیکی برای موفقیت در والیبال ساحلی را دارد. محیط ورزشی خانواده و عشق پرتلاشاش به توپ و شن باعث شد خیلی زود وارد رقابتهای داخلی شود و دوستیاش با اعظمهای والیبال برزیل شکل بگیرد.
ReplyDeleteبیوگرافی تالیتا آنتونس
آپریل راس، متولد ۲۰ ژوئن ۱۹۸۲ در کاستا مِسا، کالیفرنیا، از کودکی ورزشهایی مانند بسکتبال و فوتبال را تجربه کرد تا بالاخره در دوران راهنمایی بخشنده تصمیم گرفت وارد والیبال شود؛ در دبیرستان Newport Harbor دو عنوان قهرمانی ایالتی کسب کرد و در نهایت در سال ۲۰۰۰ بهعنوان بهترین بازیکن سراسر آمریکا (Gatorade Player of the Year) انتخاب شد
ReplyDeleteبیوگرافی آپریل راس
سانه کایزر در ۶ فوریهی ۱۹۸۵ در دوتینخم، هلند، به دنیا آمد؛ دختری که در کودکی شناگر و در نوجوانی پرسابقهی واترپلو بود اما بهخاطر رنگ گرفتن موهای بلوندش از کلر آب، از آن ورزش دل کند و در ۱۱ سالگی به والیبال روی آورد، مسیرش را در تیم Orion شروع کرد و به سرعت با پیوندی دوستانه با توپ والیبال ارتباط برقرار کرد
ReplyDeleteبیوگرافی سانه کایزر
لاريسا فرانسا ماسترینی در ۱۴ آوریل ۱۹۸۲ در کاتشاویرو دو ایتاپهمیرین، ایالت اسپیریتو سانتو در برزیل زاده شد. او دوران کودکیاش را در پاراگومیناس و بعدها فورتالزا گذراند، جایی که در ابتدا بسکتبال و والیبال داخل سالن را تجربه کرد و رفتهرفته جذب شنهای ساحل شد. محیط خانوادهای که به تحرک ورزشی اهمیت میداد، زمینهای فراهم کرد تا استعدادش در مسیر والیبال ساحلی شکوفا شود.
ReplyDeleteبیوگرافی لاريسا فرانسا
شیلا تاوارس دی کاسترو در ۱ ژوئیه ۱۹۸۳ در بلو هوریزونته، ایالت میناس گرایس برزیل، دیده به جهان گشود؛ دختری که زودتر از بسیاری مسیرش را مشخص کرده بود. در سن ۱۴ سالگی توسط باشگاه میناس کشف و بهسرعت در مسیر حرفهای قرار گرفت؛ ارتباطاش با توپ والیبال و تمرین مداوم نشان از سرنوشتی متفاوت داشت.
ReplyDeleteبیوگرافی شیلا کاسترو
اگر به دنبال یک تجربه متفاوت از پیش بینی های ورزشی و بازی های هیجان انگیز آنلاین هستید شیر بت دانلود بهترین انتخاب برای شما خواهد بود. اپلیکیشن Shirbet با طراحی کاربر پسند سرعت بالا و تنوع گسترده ای از رشته های ورزشی به کاربران این امکان را می دهد.
ReplyDeleteشیر بت دانلود
تیم پشتیبانی shirbet به صورت 24 ساعته در دسترس بوده و آماده پاسخ گویی به سوالات و رفع مشکلات کاربران است.
ReplyDeleteدانلود شیر بت
کتاب صوتی ۱۲ قانون زندگی جردن پیترسون در سایت پادکست اکتور برای شما مخاطبان تهیه و ارائه شده است. این کتاب، اثری پرفروش در حوزه روانشناسی و خودشناسی است. این کتاب، به شکلی جذاب، توصیههایی برای مواجهه با چالشهای زندگی مدرن ارائه میدهد.
ReplyDeleteجفری پیترسون
وب سایت جت تم فایل کتاب جادوگران بازار نوین اثر محمد کریم طهماسبی را در سایت قرار داده است. این کتاب به بررسی استراتژیهای نوین در بازارهای مالی و نحوه تصمیمگیریهای هوشمندانه میپردازد. محمد کریم طهماسبی در این کتاب با استفاده از تجربیات و مثالهای واقعی، نشان میدهد که چگونه میتوان در بازارهای پیچیده امروزی موفق شد. این کتاب در 640 صفحه به رشته تحریر درآمده و به تمامی شما عزیزان تقدیم میگردد.
ReplyDeletepdf کتاب جادوگران بازار نوین
برنامه shirbet یکی از محبوب ترین اپلیکیشن های حوزه شرط بندی ورزشی و بازی های کازینو آنلاین است. با دانلود برنامه شیر بت شما کاربران می توانید به سادگی و تنها با چند کلیک به امن ترین و جدید ترین امکانات این پلتفرم دسترسی پیدا کنید. توسعه دهندگان این اپلیکیشن با بهره گیری از آخرین تکنولوژی های رمز نگاری امنیت اطلاعات کاربران را تضمین کرده اند. البته تیم پشتیبانی shirbet به صورت 24 ساعته در دسترس بوده و آماده پاسخ گویی به سوالات و رفع مشکلات کاربران است.
ReplyDeleteshirbet شیربت
ReplyDeleteبرای علاقه مندان به شرط بندی آنلاین و بازی های کازینو دانلود شیر بت اولین قدم برای ورود به این دنیای هیجان انگیز است. این اپلیکیشن با بهره گیری از تجربه متخصصان حوزه فناوری و بازی های آنلاین طراحی شده تا بهترین تجربه کاربری را ارائه دهد.
سایت شرط بندی شیر بت
اگر به دنبال یک تجربه متفاوت از پیش بینی های ورزشی و بازی های هیجان انگیز آنلاین هستید شیر بت دانلود بهترین انتخاب برای شما خواهد بود. اپلیکیشن Shirbet با طراحی کاربر پسند سرعت بالا و تنوع گسترده ای از رشته های ورزشی به کاربران این امکان را می دهد که هر لحظه و هر مکان بازی های دلخواه خود را پیش بینی کرده و از هیجان و سرگرمی لذت ببرند.
ReplyDeleteسایت شیر بت
اگر به دنبال یک تجربه متفاوت از پیش بینی های ورزشی و بازی های هیجان انگیز آنلاین هستید شیر بت دانلود بهترین انتخاب برای شما خواهد بود. اپلیکیشن Shirbet با طراحی کاربر پسند سرعت بالا و تنوع گسترده ای از رشته های ورزشی به کاربران این امکان را می دهد که هر لحظه و هر مکان بازی های دلخواه خود را پیش بینی کرده و از هیجان و سرگرمی لذت ببرند. تیم توسعه دهنده Shirbet با رعایت کردن قوانین بین المللی و استاندارد های امنیتی محیطی مطمئن و پایدار برای شرط بندی فراهم کرده است.
ReplyDeleteسایت شیر بت
وان ایکس بت اصلی ، وان ایکس بت اصلی دانلود ، دانلود اپلیکیشن وان ایکس بت ، اپلیکیشن وان ایکس بت ایرانی ، دانلود رایگان اپ وان ایکس بت ، برنامه وان ایکس بت اندروید ، وان ایکس بت ایرانی ، سایت وان ایکس بت ، سایت وانایکس بت ، وان ایکس بت ، سایت اصلی وان ایکس بت ، 1xbet
ReplyDeleteلود ، دانلود اپلیکیشن وان ا
سایت وین بت بدون فیلتر فرصتی ایده آل برای کاربران علاقه مند به شرط بندی آنلاین ورزشی فراهم کرده است تا بدون نیاز به استفاده از ابزار های تغییر آی پی به خدمات این سایت دسترسی داشته باشند. این نسخه از سایت با رعایت اصول امنیت سایبری و ارائه راهکار های فنی برای دور زدن محدودیت های دسترسی امکان استفاده آسان و بی دردسر را به کاربران ارائه می دهد.
ReplyDeletewinbet سایت پیش بینی
سایت وین بت بدون فیلتر فرصتی ایده آل برای کاربران علاقه مند به شرط بندی آنلاین ورزشی فراهم کرده است تا بدون نیاز به استفاده از ابزار های تغییر آی پی به خدمات این سایت دسترسی داشته باشند.
ReplyDeletewinbet سایت پیش بینی
سایت وین بت بدون فیلتر فرصتی ایده آل برای کاربران علاقه مند به شرط بندی آنلاین ورزشی فراهم کرده است تا بدون نیاز به استفاده از ابزار های تغییر آی پی به خدمات این سایت دسترسی داشته باشند.
ReplyDeleteسایت winbet
وین بت بدون فیلترشکن
ReplyDeleteبرای کاربران آیفون تجربه شرط بندی آنلاین با امنیت بالا و سرعت بی نظیر اهمیت زیادی دارد. onjabet iOS نسخه ای حرفه ای و کاربر پسند از اپلیکیشن اونجا بت است که با رابط کاربری ساده و بهینه برای سیستم عامل iOS طراحی شده است. این اپلیکیشن با رعایت کامل استاندارد های امنیتی و حفظ حریم خصوصی کاربران تجربه ای ایمن و لذت بخش ارائه می دهد.
ReplyDeleteسایت اونجا بت
اگر این سؤال برای شما مطرح شده که آیا سایت بتکارت معتبر است باید بدانید که این پلتفرم با سابقه طولانی در زمینه شرط بندی ورزشی و بازی های کازینویی یکی از نام های شناخته شده در بازار بین المللی است. بتکارت با ارائه درگاه های پرداخت امن ، پشتیبانی ۲۴ ساعته ، احراز هویت پیشرفته و رعایت استاندارد های فنی نشان داده که امنیت و رضایت کاربران در اولویت آن قرار دارد. همچنین فعالیت تحت لایسنس های معتبر و وجود اپلیکیشن رسمی اعتبار این برند را افزایش داده و آن را به گزینه ای مطمئن برای علاقه مندان فارسی زبان تبدیل کرده است.
ReplyDeleteآیا سایت بتکارت معتبر است
کانال تلگرام ماه بت یکی از مطمئن ترین روش ها برای دسترسی به جدید ترین لینک های بدون فیلتر سایت و دریافت اخبار و اطلاعیه های رسمی است. از آنجایی که دامنه های سایت ماه بت همیشه به دلیل محدودیت های داخلی فیلتر می شون پشتیبانی این سایت لینک های جدید را از طریق کانال تلگرام به کاربران اعلام می کند. علاوه بر این کاربران می توانند در کانال رسمی ماه بت به آموزش های شرط بندی و اطلاعیه های مربوط به بونوس ها و رویداد های خاص نیز دسترسی داشته باشند. عضویت در کانال تلگرام ماه بت به شما کاربران کمک می کند همیشه از آخرین تغییرات و امکانات سایت مطلع باشید و با اطمینان بیشتری فعالیت کنید.
ReplyDeleteاینستاگرام ماه بت
رسا فایل پی دی اف کتاب فاتح هرات ناصر نجمی PDF 🟠 در 420 صفحه را برای شما همراهان گرامی آماده کرده است. مراد میرزا حسام السلطنه فرزند عباس میرزا شاهزاده ی قاجار و فرمانروا خراسان در زمان حکومت ناصر الدین شاه بود. او هم زمان با آغاز نقشه انگلیس در جریان جدا سازی هرات با لشگر خود به هرات رفت و توانست آن شهر را محاصره و سپس بار دیگر آن را به خاک ایران باز گرداند. در اثر این اقدام فرمانروا هرات به شهر کابل گریخت. پسر سلطان حسام میرزا با نام ابوالفتح میرزا مؤید الدوله داماد ناصرالدین شاه بود. در سایت رسا فایل با ما همراه باشید.
ReplyDeleteکتاب فاتح هرات ناصر نجمی
بت برو فارسی نسخه ای بومی شده از سایت شرط بندی بین المللی Bet Boro است که برای کاربران ایرانی طراحی شده است. این نسخه با رابط کاربری کاملاً فارسی، پشتیبانی ۲۴ ساعته به زبان فارسی و روش های پرداخت متناسب با نیاز کاربران داخل ایران تجربه ای قابل قبول را فراهم کرده است. همچنین در betboro فارسی امکان شرکت در پیش بینی های ورزشی بازی های کازینویی و بازی انفجار وجود دارد. این نسخه تلاش دارد ضمن حفظ کیفیت نسخه بین المللی از نظر فرهنگی و فنی با مخاطب ایرانی هماهنگ باشد.
ReplyDeleteادرس بدون فیلتر بت برو
betboro.com دامنه رسمی و بین المللی سایت بت برو است که خدمات شرط بندی را در سطح جهانی ارائه می دهد. این وب سایت با ساختاری حرفه ای و پشتیبانی از زبان های مختلف از جمله انگلیسی و فارسی توانسته پاسخگوی نیاز طیف وسیعی از کاربران باشد.
ReplyDeletebetboro.com
betboro.com دامنه رسمی و بین المللی سایت بت برو است که خدمات شرط بندی را در سطح جهانی ارائه می دهد. این وب سایت با ساختاری حرفه ای و پشتیبانی از زبان های مختلف از جمله انگلیسی و فارسی توانسته پاسخگوی نیاز طیف وسیعی از کاربران باشد. استفاده از پروتکل های امنیتی HTTPS سیستم احراز هویت دو مرحله ای و درگاه های امن بانکی از مزایای اصلی betboro.com است. اگر به دنبال تجربه ای امن و حرفه ای در فضای شرط بندی آنلاین هستید بررسی این دامنه توصیه می شود.
ReplyDeleteادرس بدون فیلتر بت برو
بت برو سایت شرط بندی
ReplyDeleteدسترسی به سایت اصلی بت برو برای کاربران ایرانی همواره چالشبر انگیز بوده است را که دامنه اصلی به دلیل محدودیت های داخلی اغلب فیلتر می شود. با این حال آدرس اصلی سایت با دامنه بین المللی betboro.com فعالیت دارد و از نظر فنی و امنیتی قابل اعتماد است. برای کاربران داخل ایران استفاده از لینک های به روز رسانی شده و بررسی اعتبار دامنه بسیار اهمیت دارد تا از ورود به صفحات فیشینگ یا نسخه های جعلی جلوگیری شود.
ماریانا آندرادا کاستا، معروف به Mari Paraíba، در روز ۳۰ ژوئیه ۱۹۸۶ در شهر Campina Grande، ایالت Paraíba برزیل چشم به جهان گشود. با قد ۱.۸۱ متر و بدنی متناسب، او خیلی زود در نقش اسپکر خارج (Outside Hitter) معرفی شد؛ توانایی اسپایک تا ارتفاع ۲۹۵ سانتیمتر و بلاک ۲۸۳ سانتیمتر، نشانهای از نویدبخش بودن مسیر حرفهایاش بود .
ReplyDeleteبیوگرافی ماریانا کوستا
ثئا در سال ۱۹۹۸ در اوسلوی نروژ به دنیا آمد و دوران کودکیاش را در شهر کوتوبن گذراند. جایی که کمکم عشق به والیبال را در زمینهای آموزشی مدرسه و باشگاههای محلی کشف کرد و در ۱۲ سالگی اولین قدمها را برای تبدیل شدن به ورزشکاری حرفهای برداشت. این علاقه او باعث شد وارد برنامههای تخصصی مثل Wang Toppidrett و ToppVolley Norge شود؛ جایی که آموزش فشرده ورزشی و تحصیلی، همتراز با هم ارائه میشد. نهایتاً با عملکرد درخشانش توانست بورسیه دانشگاه UNLV را دریافت کند و به لاسوگاس برود، جایی که بهعنوان مهاجم (Opposite/OH) در تیم دانشگاهی Division I نقش ایفا کرد.
ReplyDeleteبیوگرافی تئا سانس سوئدر
جیمی رابینز در تاریخ ۱۹۹۷ در ایالات متحده آمریکا به دنیا آمد و از همان سالهای کودکی علاقهاش به ورزشهای تیمی بهویژه والیبال شکل گرفت. او در خانوادهای بزرگ شد که ورزش و فعالیت بدنی بخشی جداییناپذیر از زندگی روزمرهشان بود و همین موضوع مسیر او را به سمت حرفهای شدن هموار کرد. جیمی خیلی زود استعداد خود را در زمینهای ورزشی مدرسه نشان داد و با تلاش و پشتکار توانست جایگاه ویژهای در تیمهای جوانان بهدست آورد. او از همان ابتدا نشان داد که علاوه بر توانایی فنی، روحیه رهبری و جنگندگی دارد که بعدها در موفقیتهای ورزشیاش نقشی اساسی ایفا کرد.
ReplyDeleteبیوگرافی جیمی رابینز
نینا بتشارت در تاریخ ۱۴ اکتبر ۱۹۹۵ در شهر کوچک استاینهاوزن در سوئیس به دنیا آمد؛ منطقهای آرام و سرسبز که شاید کمتر کسی تصور میکرد روزی یکی از پرافتخارترین ورزشکاران والیبال ساحلی جهان از دل آن بیرون بیاید. او از همان کودکی علاقهای ویژه به ورزش نشان میداد و انرژی بالایی که در وجودش بود باعث شد خیلی زود مسیرش را به سمت رشتهای پرهیجان مثل والیبال هدایت کند. نینا در نوجوانی وارد مسابقات محلی شد و با استعداد ذاتی و پشتکار بینظیرش به سرعت توجه مربیان ملی را به خود جلب کرد. او از همان سالهای ابتدایی نشان داد که تنها یک بازیکن معمولی نیست و آیندهای بزرگ در انتظارش خواهد بود.
ReplyDeleteبیوگرافی نینا بتشارت
کیسی مکتویش در تاریخ ۲۱ ژانویه ۱۹۸۹ در کانادا متولد شد و از همان دوران کودکی نشانههایی از علاقه و استعداد او در ورزش بهویژه والیبال دیده میشد. او در خانوادهای بزرگ شد که ورزش و فعالیت بدنی بخشی جداییناپذیر از زندگی روزمره بود و همین زمینه باعث شد تا کیسی خیلی زود وارد مسیر ورزش حرفهای شود. دوران کودکی و نوجوانی او با حضور در تیمهای محلی و مدرسهای سپری شد و مربیان از همان ابتدا آیندهای درخشان را برایش پیشبینی میکردند. او با تلاش و پشتکار توانست در همان سالهای ابتدایی در سطح منطقهای بدرخشد و توجه بسیاری از مربیان و استعدادیابها را به خود جلب کند.
ReplyDeleteبیوگرافی کیسی مکتویش
مارکیتا اسلوکووا در تاریخ ۲۸ ژوئن ۱۹۸۸ در شهر پراگ، پایتخت جمهوری چک به دنیا آمد و از همان سالهای نخست زندگی، علاقه و استعداد او در ورزش آشکار بود. او در خانوادهای رشد کرد که به ورزش و فعالیتهای بدنی اهمیت میدادند و همین موضوع موجب شد تا اسلوکووا خیلی زود به سمت رشتههای ورزشی مختلف کشیده شود. دوران کودکی او پر از تجربههای ورزشی در رشتههای متنوع بود، اما در نهایت والیبال بیش از هر چیزی توجه او را به خود جلب کرد. حضور در باشگاههای محلی و مدرسهای، پایههای اولیه موفقیت او در سالهای آینده را شکل داد و راه او را به سمت والیبال حرفهای هموار کرد.
ReplyDeleteبیوگرافی مارکیتا اسلوکووا
سانیوا هلند-هانسن در ۷ ژانویه ۱۹۹7 در شهر برگن نروژ به دنیا آمد، شهری ساحلی و آرام که در میان رشتهکوهها و در کنار آبهای سرد شمال اروپا قرار دارد. رشد کردن در چنین محیطی باعث شد او از همان کودکی با طبیعت، فعالیتهای بیرونی و ورزشهای مرتبط با دریا و ساحل ارتباط نزدیکی پیدا کند. خانوادهاش مشوق اصلی او در مسیر ورزش بودند و همواره از علاقه او به فعالیتهای ورزشی حمایت کردند. کودکی سانیوا با تجربههای ورزشی گوناگون گره خورده بود، اما والیبال به مرور به اصلیترین علاقهاش تبدیل شد.
ReplyDeleteبیوگرافی سانیوا هلند-هانسن
آنوک ورژ-دپره در ۲۹ فوریه ۱۹۹۲ در شهر برن سوئیس به دنیا آمد، شهری آرام و تاریخی که همواره در زمینه ورزش استعدادهای بزرگی را معرفی کرده است. خانواده او نقشی پررنگ در مسیر ورزشیاش داشتند و بهویژه پدر و مادرش که علاقهمند به فعالیتهای ورزشی بودند، حمایت زیادی از او نشان دادند. آنوک در دوران کودکی به چندین رشته ورزشی علاقه داشت اما روحیه پرانرژی و علاقهاش به فضای ساحلی باعث شد به سمت والیبال کشیده شود. همین حمایت خانوادگی و علاقه ذاتی به ورزش، نقطه شروعی برای آیندهای درخشان در والیبال ساحلی بود.
ReplyDeleteبیوگرافی آنوک ورژ-دپره
گابریلا گیمارش در ۱۷ مارس ۱۹۹۴ در برزیل متولد شد، کشوری که عشق به والیبال بخشی جداییناپذیر از فرهنگ ورزشی آن محسوب میشود. او در خانوادهای بزرگ شد که ورزش و فعالیت بدنی اهمیت زیادی داشت و از همان کودکی با توپ و تمرینهای ورزشی آشنا شد. علاقه گابریلا به والیبال از دوران کودکی شکل گرفت و انرژی فراوانش او را به سمت باشگاهها و مسابقات محلی کشاند. خانواده او همیشه حامی او بودند و با تشویقهای مستمر، زمینه را برای پیشرفت حرفهایاش فراهم کردند.
ReplyDeleteبیوگرافی گابریلا گیمارش
ابرار کاراکورت در ۱۱ ژوئیه ۲۰۰۰ در شهر بالیکاسیر ترکیه متولد شد. از همان دوران کودکی، انرژی فوقالعاده و علاقه به ورزش در وجود او مشهود بود و خانوادهاش نقش مهمی در هدایت و حمایت او ایفا کردند. او در یک محیط فعال و پویا رشد کرد و از همان ابتدا با ورزشهای مختلفی سر و کار داشت، اما والیبال به مرور تبدیل به اصلیترین علاقه او شد. شور و شوق او برای بازی و رقابت باعث شد خیلی زود مسیر حرفهای را در این ورزش انتخاب کند.
ReplyDeleteبیوگرافی ابرار کاراکورت
خلاصه کتاب آموزش تفکر به کودکان و نوجوانان علی ستاری
ReplyDeleteفوتبال در آرژانتین از اوایل قرن بیستم بهسرعت گسترش پیدا کرد و به بخشی جدانشدنی از فرهنگ این کشور تبدیل شد. تیم ملی فوتبال آرژانتین نخستین بازی رسمی خود را در سال ۱۹۰۱ برابر اروگوئه انجام داد و همین آغاز مسیری بود که بعدها این کشور را به یکی از قدرتهای بیچونوچرای فوتبال جهان بدل کرد. عشق و علاقه مردم به فوتبال به اندازهای است که ورزشگاهها همیشه مملو از جمعیتی پرشور و آوازهایی ماندگار است که هویت اجتماعی آنها را نشان میدهد. همین اشتیاق بیپایان سبب شد فوتبال نه فقط یک ورزش، بلکه بهنوعی نماد ملی برای آرژانتینیها شود
ReplyDeleteبیوگرافی تیم ملی آرژانتین
فوتبال در ازبکستان ریشهای عمیق در دوران شوروی دارد، جایی که تیمهای باشگاهی تاشکند و سمرقند بخشی از رقابتهای فوتبال شوروی بودند. پس از استقلال این کشور در سال ۱۹۹۱، تشکیل تیم ملی فوتبال ازبکستان بهعنوان نماد هویت تازه بسیار اهمیت پیدا کرد. نخستین بازی رسمی این تیم در سال ۱۹۹۲ برابر تاجیکستان برگزار شد و همان زمان روشن شد که فوتبال میتواند یکی از مهمترین ابزارهای اتحاد ملی باشد. ازبکستان با جمعیت جوان و علاقهمند به فوتبال، خیلی زود این ورزش را بهعنوان پرطرفدارترین رشته ورزشی خود معرفی کرد.
ReplyDeleteبیوگرافی تیم ملی فوتبال ازبکستان
تیم ملی فوتبال ایران از دهه ۱۳۲۰ خورشیدی فعالیت رسمی خود را آغاز کرد و اولین بازیهایش را مقابل تیمهای همسایه برگزار کرد. در آن دوران، فوتبال در ایران هنوز ساختار حرفهای نداشت، اما علاقه مردم باعث شد خیلی زود تیم ملی به نماد ورزشی کشور تبدیل شود. نخستین بازی رسمی ایران در سال ۱۹۴۱ مقابل افغانستان انجام شد و همین دیدار آغاز راهی بود که بعدها به دهها افتخار ملی منجر شد. تیم ملی در همان سالها با وجود امکانات کم، پایههای موفقیت آینده را بنا گذاشت.
ReplyDeleteبیوگرافی تیم ملی ایران
تیم ملی فوتبال اکوادور در دهه ۱۹۳۰ فعالیت رسمی خود را آغاز کرد و اولین بازی ملی این تیم به سال ۱۹۳۸ بازمیگردد. در آن دوران، فوتبال در اکوادور بهتازگی شکل گرفته بود و ساختار حرفهای نداشت، اما شور و علاقه جوانان و حمایت مردم باعث شد تیم ملی بهمرور جایگاهی جدی پیدا کند. حضور در کوپا آمریکا بهعنوان یکی از اعضای کنفدراسیون فوتبال آمریکای جنوبی (CONMEBOL) اولین تجربههای بینالمللی این تیم بود. گرچه اکوادور سالها در جمع قدرتهای قاره جایی نداشت، اما همین حضورهای ابتدایی به رشد فوتبال در این کشور کمک بزرگی کرد.
ReplyDeleteبیوگرافی تیم ملی فوتبال اکوادور
انگلستان اولین کشوری بود که فوتبال را به شکل امروزی سازمان داد و در سال ۱۸۷۲ نخستین بازی ملی خود را مقابل اسکاتلند برگزار کرد. این مسابقه بدون گل مساوی شد اما تاریخساز گشت و نام انگلیسیها را بهعنوان “مخترعان فوتبال” بر سر زبانها انداخت. ومبلی قدیم بعدها به نماد ملیگرایی فوتبالی در انگلستان بدل شد و هر مسابقهای در آن ورزشگاه، برای مردم به نوعی یادآور ریشههای تاریخیشان است.
ReplyDeleteبیوگرافی تیم ملی فوتبال انگلستان
تیم ملی فوتبال آمریکا از سال ۱۹۱۳ زیر نظر فدراسیون فوتبال این کشور شکل گرفت، اما برخلاف ورزشهایی مثل بیسبال و بسکتبال، فوتبال در آمریکا راه دشواری برای محبوبیت داشت. نخستین حضور آنها در جام جهانی ۱۹۳۰ با صعود به نیمهنهایی تاریخساز شد و نشان داد که ایالات متحده ظرفیت درخشیدن را دارد. با این حال دههها طول کشید تا فوتبال جایگاه خود را در میان ورزشهای پرطرفدار آمریکایی پیدا کند و تیم ملی به یک قدرت منطقهای تبدیل شود.
ReplyDeleteبیوگرافی آمریکا
تیم ملی فوتبال اروگوئه در سال ۱۹۰۱ تشکیل شد و خیلی زود توانست خودش را بهعنوان یکی از نخستین قدرتهای فوتبال دنیا معرفی کند. این کشور کوچک آمریکای جنوبی با جمعیت محدود، در همان سالهای ابتدایی قرن بیستم نشان داد که فوتبال میتواند به بخشی از هویت ملیاش تبدیل شود. اروگوئه نهتنها اولین تیمی بود که جام جهانی را فتح کرد، بلکه در المپیک هم به مدالهای طلای پیاپی رسید و عملاً فوتبال را به نماد غرور ملی خود بدل کرد.
ReplyDeleteبیوگرافی فوتبال اروگوئه
تیم ملی فوتبال استرالیا که با لقب «ساکِروز» (Socceroos) شناخته میشود، اولین بار در دهه ۱۹۲۰ شکل گرفت و از همان زمان فوتبال را بهعنوان یکی از رشتههای مهم ورزشی در کشور معرفی کرد. استرالیا در ابتدا بیشتر با ورزشهایی مانند راگبی و کریکت شناخته میشد، اما با گذشت زمان فوتبال توانست جایگاه ویژهای در میان مردم پیدا کند. بازیهای ملی برای استرالیاییها فرصتی بود تا نشان دهند که حتی در قارهای دورافتاده هم میتوانند با بزرگان فوتبال رقابت کنند.
ReplyDeleteبیوگرافی استرالیا
تیم ملی فوتبال اسپانیا فعالیت رسمی خود را از سال ۱۹۲۰ آغاز کرد و خیلی زود توانست جایگاه خود را در رقابتهای اروپایی پیدا کند. اولین بازی رسمی این تیم در المپیک ۱۹۲۰ برگزار شد و با کسب مدال نقره، نام اسپانیا بهعنوان یکی از قدرتهای نوظهور فوتبال ثبت شد. فوتبال در آن زمان بیشتر جنبه سرگرمی و ملیگرایی داشت، اما همین پایهها مسیر شکلگیری تیمی منسجم و قدرتمند را در دهههای بعد فراهم کرد.
ReplyDeleteبیوگرافی تیم ملی اسپانیا
بیوگرافی تیم ملی فوتبال اسکاتلند
ReplyDeleteنمونه سوالات مبانی فلسفه مشاوره و روان درمانی
ReplyDeleteکتاب تاکسی سواری سروش صحت pdf
ReplyDeleteبرای دانلود بت 120 کاربران میت وانند به لینک های رسمی ارائه شده در کانال های اطلاع رسانی این برند مراجعه کنند.
ReplyDeleteسایت بت ۱۲۰
سایت bet120x یکی از پلتفرم های شرط بندی ورزشی و کازینویی است که تلاش دارد با ارائه محیطی حرفه ای و امکانات متنوع کاربران ایرانی را جذب کند.
ReplyDeleteسایت شرط بندی bet120x
برنامه 1xBet یکی از جامع ترین و پیشرفته ترین اپلیکیشن های شرط بندی ورزشی و بازی های آنلاین در سطح بین المللی به شمار می رود. این نرم افزار با طراحی کاربرپسند و سرعت عملکرد بالا، تجربه ای روان و حرفه ای را برای کاربران فراهم می سازد.
ReplyDeleteدانلود وان ایکس بت جدید
ReplyDeleteورود به سایت برد بت bordbet یکی از دغدغه های کاربران است به ویژه زمانی که آدرس های این سایت به دلایل مختلف فیلتر می شوند. برد بت به عنوان یک سایت شرط بندی معتبر در ایران توانسته اعتماد تعداد زیادی از کاربران را جلب کند. برای ورود امن و بدون فیلتر به سایت bordbet باید از لینک های رسمی و به روز استفاده کنید.
برد بت دانلود
ReplyDeleteاپلیکیشن سایت برد بت Bordbet یکی از ویژگی های کلیدی این پلتفرم است که به کاربران امکان می دهد تجربه ای سریع تر، امن تر و راحت تر در شرط بندی داشته باشند. این اپلیکیشن مخصوص سیستم عامل اندروید طراحی شده و شامل بازی هایی است. برای دسترسی سریع و آسان به امکانات شرط بندی بسیاری از کاربران عبارت دانلود سایت برد بت Bordbet را جستجو می کنند.
اپلیکیشن سایت برد بت bordbet
سایت ماف بت (MafBet) یکی از پلتفرم های معتبر در زمینه شرط بندی آنلاین و بازی های کازینویی است که امکانات متنوعی را در اختیار کاربران خود قرار داده است
ReplyDeletemafbet
برنامه 1xBet یکی از جامع ترین و پیشرفته ترین اپلیکیشن های شرط بندی ورزشی و بازی های آنلاین در سطح بین المللی به شمار می رود.
ReplyDelete1xbet دانلود
سایت جدید رومابت با به روز رسانی های گسترده و طراحی تازه توانسته عملکردی روان تر و تجربه ای بهتر نسبت به نسخه های پیشین ارائه دهد. در این نسخه جدید بخش کازینو زنده پیش بینی زنده بازی های مهارتی و ابزار های کنترلی حساب کاربری ارتقا یافته اند. همچنین نسخه جدید روما بت تلاش کرده تا با ارائه آدرس های بدون فیلتر و نسخه موبایل دسترسی کاربران را آسان تر سازد. این تغییرات به وضوح نشان می دهند که تیم مدیریت سایت به بازخورد های کاربران توجه ویژه ای داشته است.
ReplyDeleteسایت شرط بندی romabet
اگر به دنبال راهی مطمئن برای ورود همیشگی به سایت رومابت هستید دانلود برنامه رسمی آن راهکار نهایی است. این برنامه به گونه ای طراحی شده که با تمام نسخه های اندروید و حتی مدلهای iOS سازگاری کامل دارد. نسخه فعلی سبک تر سریع تر و بدون باگ هاییست که در نسخه های غیر رسمی دیده می شود. فرآیند romabet دانلود با چند کلیک ساده انجام می پذیرد اما آنچه اهمیت دارد انتخاب منبع قابل اعتماد برای دریافت فایل نصبی ست. نسخه اصلی این اپلیکیشن برای گوشی های اندرویدی و همچنین iOS طراحی شده و هیچ گونه دست کاری در سورس کد آن صورت نگرفته است. در این اپ تجربه ای یکپارچه از سایت رومابت با حداقل مصرف اینترنت و سرعت بارگذاری بالا فراهم آمده و تمامی امکانات سایت در آن تعبیه شده اند.
ReplyDeleteromabet سایت
This blog covers the topic with great detail and simplicity, which makes it easy to understand even for someone new. In today’s fast-moving digital era, simply having knowledge is not enough — proper execution is key. Partnering with a professional Digital Marketing Agency ensures that these strategies are implemented effectively with measurable outcomes that drive real business success.
ReplyDelete
ReplyDeleteبا کیبورد «دانلود وین ایکس بت»، فقط کافیه یه لمس بزنی تا سریع بری سراغ نصب برنامه و شروع هیجان! دنبال لینک مطمئن برای دانلود وین ایکس بت میگردی؟ این کیبورد همیشه آمادهست! راحتترین راه برای رسیدن به اپلیکیشن وین ایکس بت همین کیبورده؛ سریع، بیدردسر و همیشه در دسترس. این کیبورد مخصوص وقتیه که نمیخوای وقتتو تلف کنی؛ یه لمس، یه دانلود، یه شروع پرانرژی!
وین اکس بت
ReplyDeleteاگر به دنبال ورود به یکی از معتبرترین سایت های شرط بندی ایرانی هستید پابلو بت ثبت نام می تواند شروعی مطمئن برای شما باشد. فرآیند ثبت نام در سایت پابلو بت بسیار ساده و سریع است و تنها با وارد کردن اطلاعات اولیه مانند ایمیل، شماره تماس و رمز عبور می توانید حساب کاربری خود را فعال کنید.
ورود به سایت پابلو بت
یافتن آدرس جدید و بدون فیلتر سایت پابلو بت برای کاربرانی که به دنبال تجربهای ایمن و حرفهای در دنیای شرط بندی آنلاین هستند، اهمیت ویژهای دارد. با توجه به فیلترینگ مداوم، بسیاری از افراد در تلاشاند تا به نسخه اصلی و معتبر این سایت دسترسی پیدا کنند.
ReplyDeleteسایت پابلو بت pablo bet
اگر بهدنبال یک تجربه سریع، حرفهای و بدون محدودیت در دنیای شرط بندی آنلاین هستید، دانلود اپلیکیشن پابلو بت بهترین انتخاب برای شماست. این اپ با طراحی ساده و کاربرپسند، امکان دسترسی مستقیم به بخشهایی مانند پیشبینی ورزشی، بازی انفجار و کازینوی آنلاین را بدون نیاز به فیلترشکن فراهم میکند. سرعت بالا، امنیت قابلاطمینان و عملکرد روان از ویژگیهای کلیدی این اپلیکیشن است که تجربهای بینقص را برای کاربران رقم میزند. با نصب پابلو بت میتوانید در هر زمان و مکان به حساب کاربری خود متصل شوید و از امکانات متنوع سایت بهرهمند شوید. برای اطمینان از اصالت و امنیت برنامه، توصیه میشود فایل دانلود را تنها از طریق آدرس رسمی سایت دریافت کنید.
ReplyDeleteدانلود برنامه پابلو بت
اگر به دنبال یک تجربه سریع، حرفهای و بدون فیلتر در دنیای شرط بندی آنلاین هستید، اپلیکیشن پابلو بت گزینهای ایدهآل برای شما خواهد بود. این برنامه با طراحی کاربرپسند و سرعت عملکرد بالا، امکان دسترسی آسان به بخشهایی مانند پیش بینی ورزشی، بازی انفجار و کازینو آنلاین را فراهم می کند.
ReplyDeleteسایت پابلو بت pablo bet
اگر به دنبال یک محیط امن و حرفه ای برای تجربه بازی انفجار هستید سایت انفجار پابلو بت یکی از بهترین گزینه ها در میان سایت های ایرانی است. این سایت با بهره گیری از الگوریتم های استاندارد و ضرایب منصفانه، فضای رقابتی و هیجان انگیزی برای کاربران فراهم کرده است. یکی از ویژگی های بارز سایت انفجار پابلو بت سرعت بالای اجرای بازی و پرداخت های سریع و مطمئن به کاربران است.
ReplyDeleteدانلود برنامه پابلو بت
ثبت نام در بت مجیک | ورود و ثبت نام
ReplyDeleteاگر به دنبال یک سایت قابل اعتماد برای شرط بندی هستید سایت شرط بندی ریچ بت می تواند گزینه مناسبی برای شما باشد. این سایت با فراهم کردن بازی های متنوع از جمله انفجار، پوکر، رولت، پیش بینی ورزشی و مسابقات زنده به کاربران این امکان را می دهد تا با دانش و مهارت خود شانس برد خود را افزایش دهند. سایت ریچ بت یکی از پلتفرمهای معتبر در حوزه شرطبندی آنلاین است که با ارائه بازیهایی مانند انفجار، پوکر، رولت و پیشبینی ورزشی توانسته کاربران زیادی را جذب کند.
ReplyDeleteسایت شرط بندی ریچ بت
کتاب تشیع و قدرت در ایران جلد دوم بهزاد کشاورزی
ReplyDeletehttps://rasafiilee.mystrikingly.com/
برای دانلود بت بال ۹۰ فقط کافیه سرچ کنید یا برید تو سایت اصلی. نسخه اندروید بیشتر جاها هست ولی مراقب باشید از جای مطمئن بگیرید. برنامه سبک و سریعه بدون پیچیدگی خاص. نصبشم دو دقیقه زمان می بره. وقتی نصب شد خیلی راحت وارد حسابتان می شوید و شرط بندی می کنید.
ReplyDeleteبت بال 90
یکی از عوامل مهم در جلب اعتماد کاربران به سایت پویان مختاری ریچ بت حضور یک چهره شناخته شده و پر حاشیه مانند پویان مختاری به عنوان موسس یا تبلیغ کننده اصلی آن است. سایت پویان مختاری ریچ بت با تکیه بر برند شخصی پویان توانسته در شبکه های اجتماعی به خوبی دیده شود و هزاران کاربر فعال جذب کند.
ReplyDeleteسایت شرط بندی ریچ بت
بازی انفجار ریچ بت یکی از پرطرفدارترین بخشهای این سایت شرط بندی است که با ضرایب بالا، طراحی گرافیکی حرفهای و الگوریتمی منصفانه، تجربهای هیجانانگیز را برای کاربران رقم میزند.
ReplyDeleteسایت شرط بندی ریچ بت
سایت شرط بندی ریچ بت
ReplyDeleteبرای دسترسی به نسخه بدون فیلتر بت بال ۹۰ کاربران می توانند از اپلیکیشن رسمی سایت یا آدرس های اعلام شده در کانال تلگرام استفاده نمایند. نسخه بدون فیلتر این سایت با همان امکانات نسخه اصلی اما با سرعت بالاتر و بدون نیاز به ابزار تغییر IP تجربه ای روان تر برای کاربران فراهم می آورد.
ReplyDeleteبت بال ۹۰ بدون فیلتر
سایت سیب بت (Sibbet) یکی از معتبرترین مراجع شرط بندی آنلاین محسوب میشود که توانسته با ارائه ضرایب رقابتی و انواع بازیهای مختلف، رضایت کاربران خود را جلب کند.
ReplyDeleteسایت شرطبندی سیب بت
برای دسترسی به نسخه جدید سیب بت، بهترین گزینه استفاده از لینکهای رسمی و معتبر است تا بتوانید از مشکلات مرتبط با فیلترینگ و سایتهای جعلی دوری کنید. نسخههای بهروزرسانیشده این سایت معمولاً با ارتقاء در رابط کاربری و امنیت همراه هستند که تجربهای بهتر و آسانتر را برای کاربران فراهم میکند. توصیه میشود همواره برای ورود به سایت سیب بت جدید از منابع قابل اعتماد بهره بگیرید و اهمیت ویژهای به حفاظت از امنیت حساب کاربری خود بدهید. اگر به دنبال یک سایت شرطبندی با امکانات بهروز و امنیت بالا هستید، سیب بت جدید میتواند گزینهای مناسب برای شما باشد. نسخه جدید سایت سیب بت با طراحی حرفهایتر، سرعت بیشتر و قابلیتهای متنوع در بخشهای پیشبینی ورزشی و بازیهای کازینویی ارائه شده است. در سیب بت جدید میتوانید از ضرایب دقیقتر، سیستم واریز و برداشت سریعتر و پشتیبانی ۲۴ ساعته بهرهمند شوید. این نسخه بهبودهای چشمگیری نسبت به نسخههای قبلی دارد و تجربهای حرفهایتر را برای کاربران فراهم میکند.
ReplyDeleteسایت شرطبندی سیب بت